
Create a theme
Build your own look for the HUD, save it to My themes, and hand it to someone else as one file.
Before you start: the TeamHUD app running. Nothing else. A theme is data, so there is no code to write.
Design the look
Section titled “Design the look”-
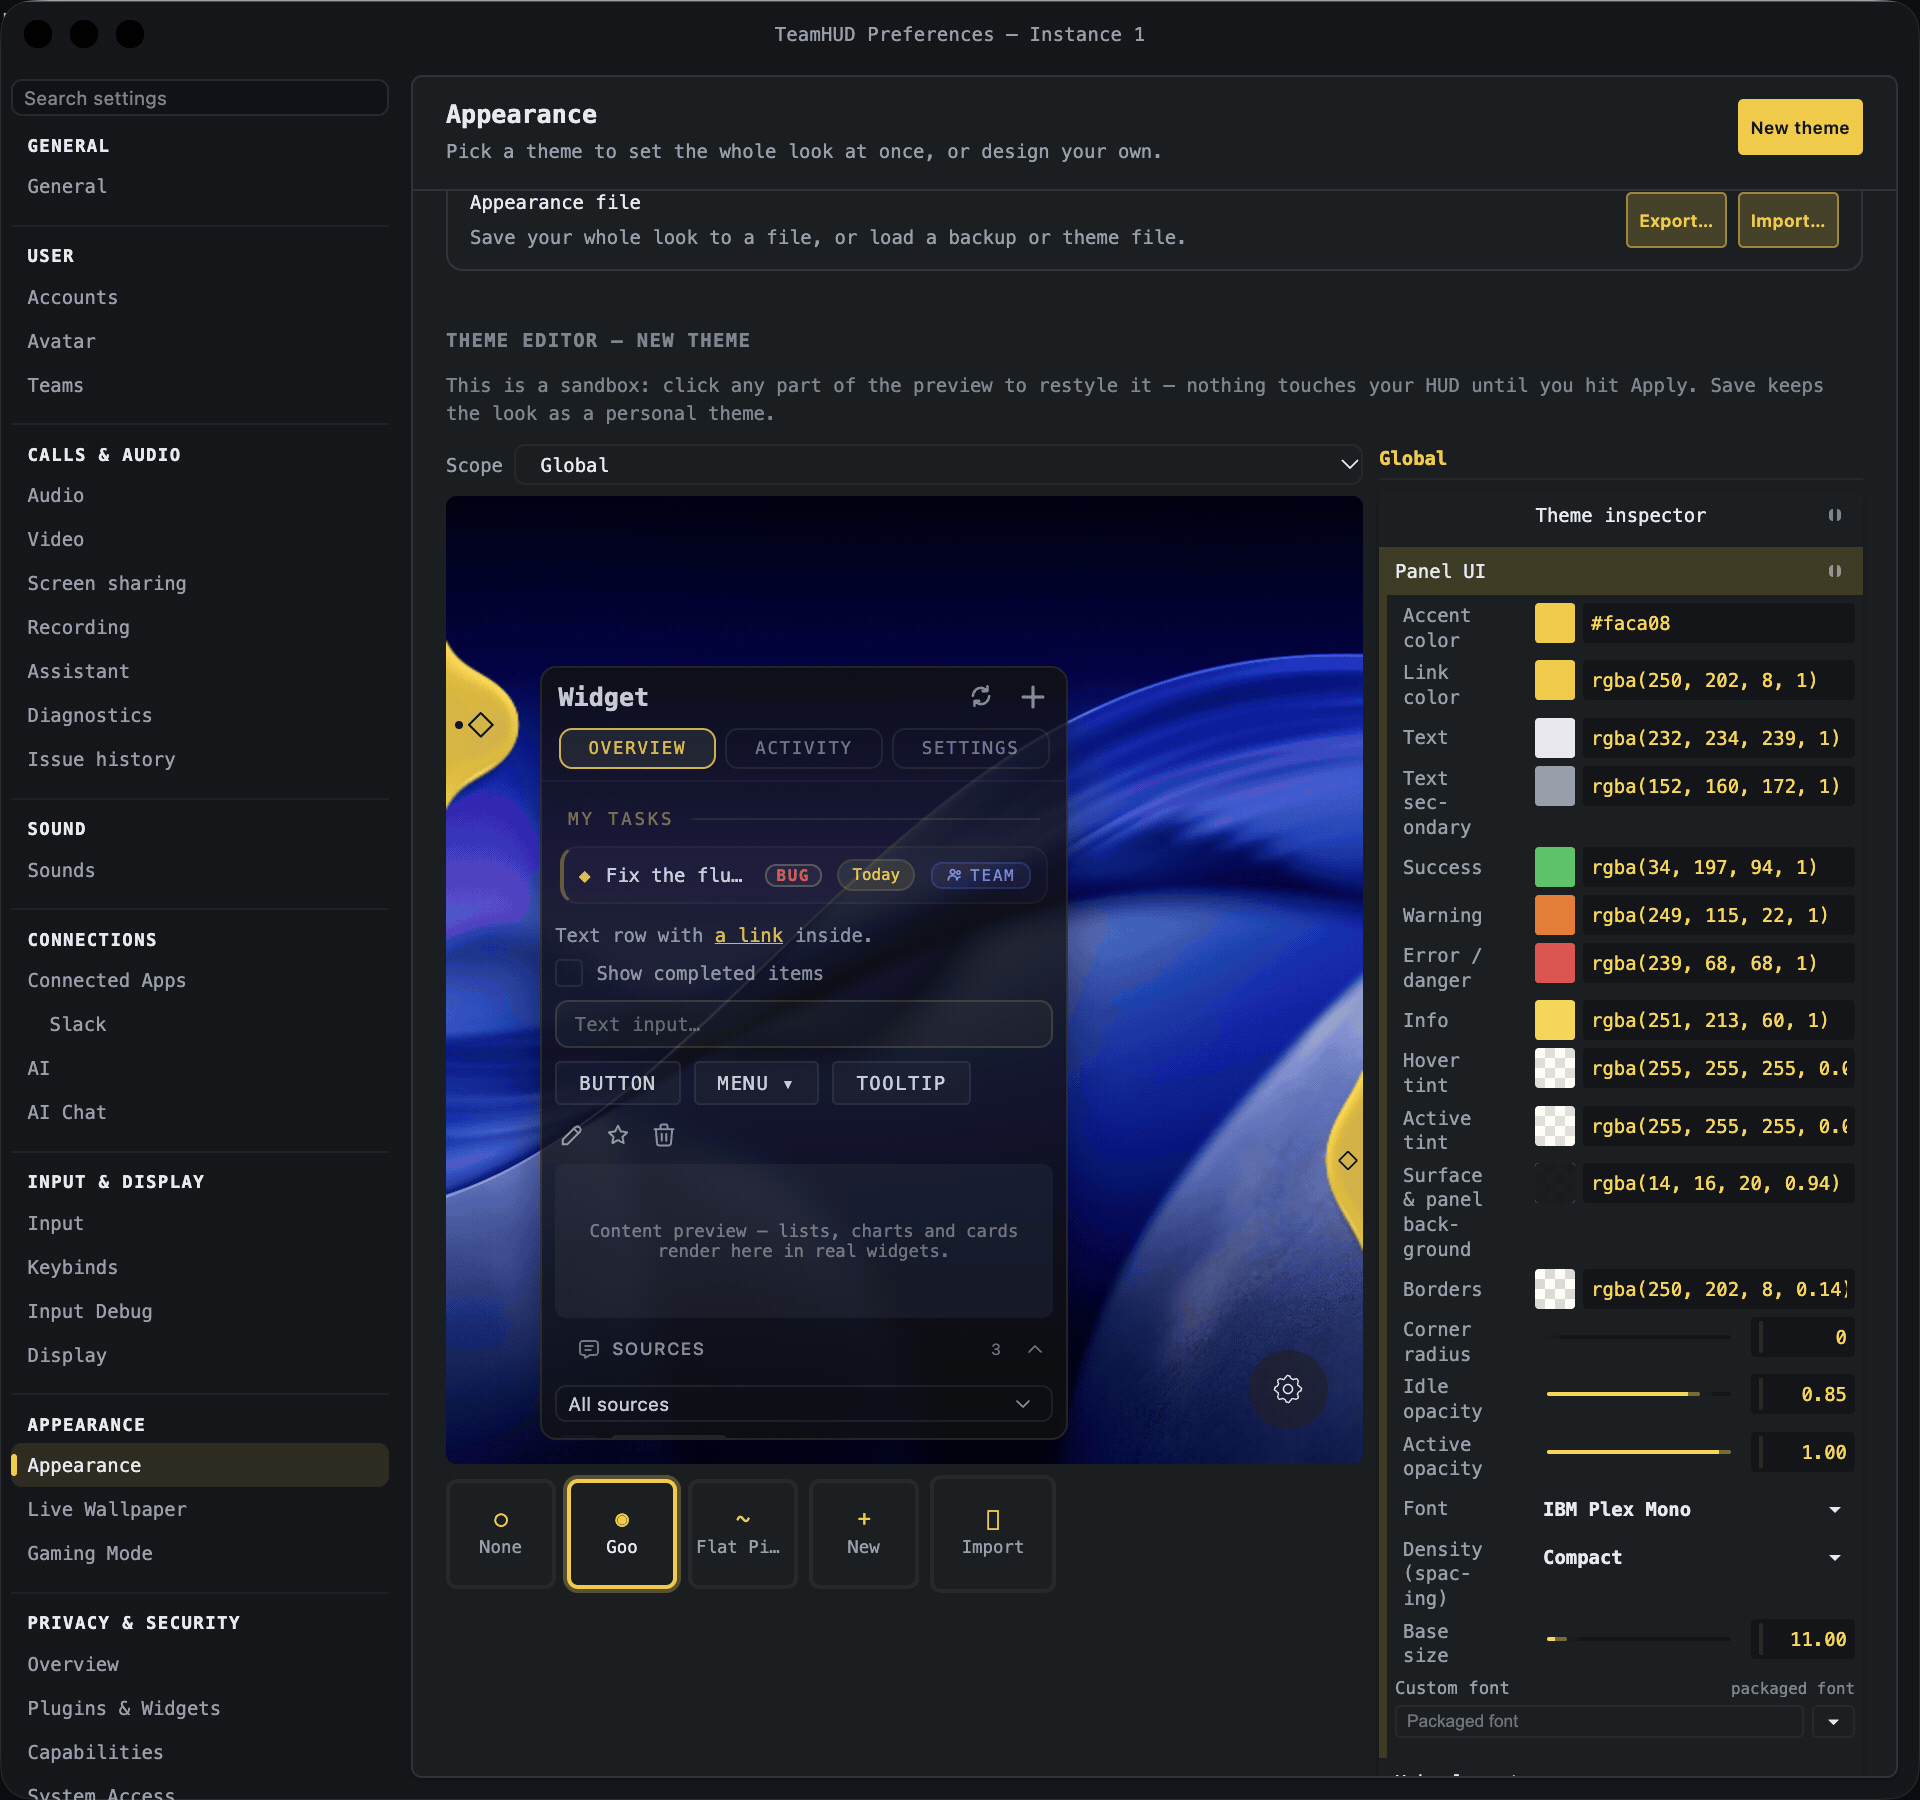
Open the editor. Go to Preferences, then Appearance, then the Appearance tab, and press New theme. To change a theme you already made, press Edit on its card under My themes.
-
Click what you want to change. The editor is a sandbox: it shows a preview of the HUD, and clicking any part of the preview selects it. Nothing touches your real HUD yet.
-
Pick a scope. The Scope menu is Global (the whole HUD) or one widget. A widget scope overrides only that widget; everything it leaves alone inherits the global look.
-
Change tokens, colours and fonts. The inspector groups the controls into folders. The main ones:
Folder What it changes Panel UI Accent colour, text, success / warning / error / info colours, hover and active tints, panel background and borders, corner radius, idle and active opacity, font, density, base size. Hub element The hub buttons: background, icon colour and stroke, size, roundness, opacity, open and close speed and easing, hover grow, collapsed-on-edge look. Goo The liquid backdrop that joins hubs: goo colour, viscosity, momentum, wetness, glow, light position and intensity. Behind each row is a
--th-*design token, so a theme re-skins every widget that follows the token rules. -
Choose a font. In Panel UI, Custom font takes the name of a font family installed on your computer, with a dropdown of what is installed. Font below it is the fallback (Inter or IBM Plex Mono). A theme carries only the family name, never the font file, so someone without that font sees the fallback.
-
Optional extras. Hub icons can be a catalog icon or your own pasted SVG. A backdrop can be a shader you wrote. Include my wallpaper and Include my sound pack (bottom bar) make the theme point at the live wallpaper and sound pack you use now.
Save and apply
Section titled “Save and apply”-
Name it. Type a Theme name (and an optional description) in the bottom bar.
-
Save theme. The first press reads Save as theme; afterwards Save theme. The button flashes “Saved” and the editor stays open. The theme appears under My themes and is stored as one JSON file in
~/.teamhud/themes. Saving does not change your HUD. -
Apply to HUD. Press Apply to HUD to put the look on your live overlay. Cancel closes the editor without applying.
What you’ll see: the overlay switches to your look at once. Back in the Appearance tab, your theme is a card under My themes; clicking it later applies the whole look and resets anything the theme does not carry.
Export a theme file
Section titled “Export a theme file”-
Under My themes, press Export on the card.
-
If the theme uses things you made (a backdrop shader, a live wallpaper, a sound pack), an Export dialog lists them with a checkbox each. Ticked items go inside the file. They start unticked, and sounds you recorded stay out unless you tick them.
-
Press Export. The file downloads as
teamhud-theme-<name>.json.
A theme file is a single JSON file: a header (kind: "teamhud-theme", schemaVersion: "1.0", name, optional description and creator, date), the look itself under bundle, and an optional assets block holding the things you ticked.
Import and share
Section titled “Import and share”To share, send the .json file however you like: chat, email, a shared folder. TeamHUD has no team-wide theme library, so each person imports it themselves.
-
On the receiving side, go to Preferences, then Appearance, then the Appearance tab. Under Backup: Appearance file, press Import… and choose the file.
-
An Imported theme panel shows the name, the creator and any bundled assets. Untick an asset to leave it out. An asset that cannot be installed is greyed with the reason.
-
Press Save to My themes to keep it, or Save and apply (Apply now for a file without assets) to put it on the HUD.
What you’ll see: the theme joins My themes. Assets that were already installed are reused; a different asset with the same name is never overwritten.
If it goes wrong
Section titled “If it goes wrong”- “Not a TeamHUD theme file” or “Unsupported theme file version”. The file is not a theme export, or it is from a newer app. Export it again.
- The font looks wrong. The family named by Custom font is not installed on that computer; the fallback font is used. The row shows whether the name is installed.
- Imported without some assets. The message names each asset and why it was refused. Everything else still imported.
- Editing the file by hand. Anything unknown is dropped on import, so a mistyped key is ignored rather than breaking the theme.
For the settings of the Appearance tab, see Appearance. For the full token list, see Theming & styling.