
AI chat
Set up AI chat once, then ask it questions or ask it to build a widget. AI chat is on the desktop app only.
Before you start: either a command-line AI tool installed on your computer, or an API key from Anthropic, OpenAI or Cursor. TeamHUD ships no model of its own.
Set it up
Section titled “Set it up”- Open the chat. Hover the AI Chat hub on the overlay. A new install shows “AI chat is off. Nothing is sent to an AI model until you turn it on.”
- Turn it on. Choose Turn on AI chat. It is off by default on purpose, and you can switch it off again in Preferences > AI Chat.
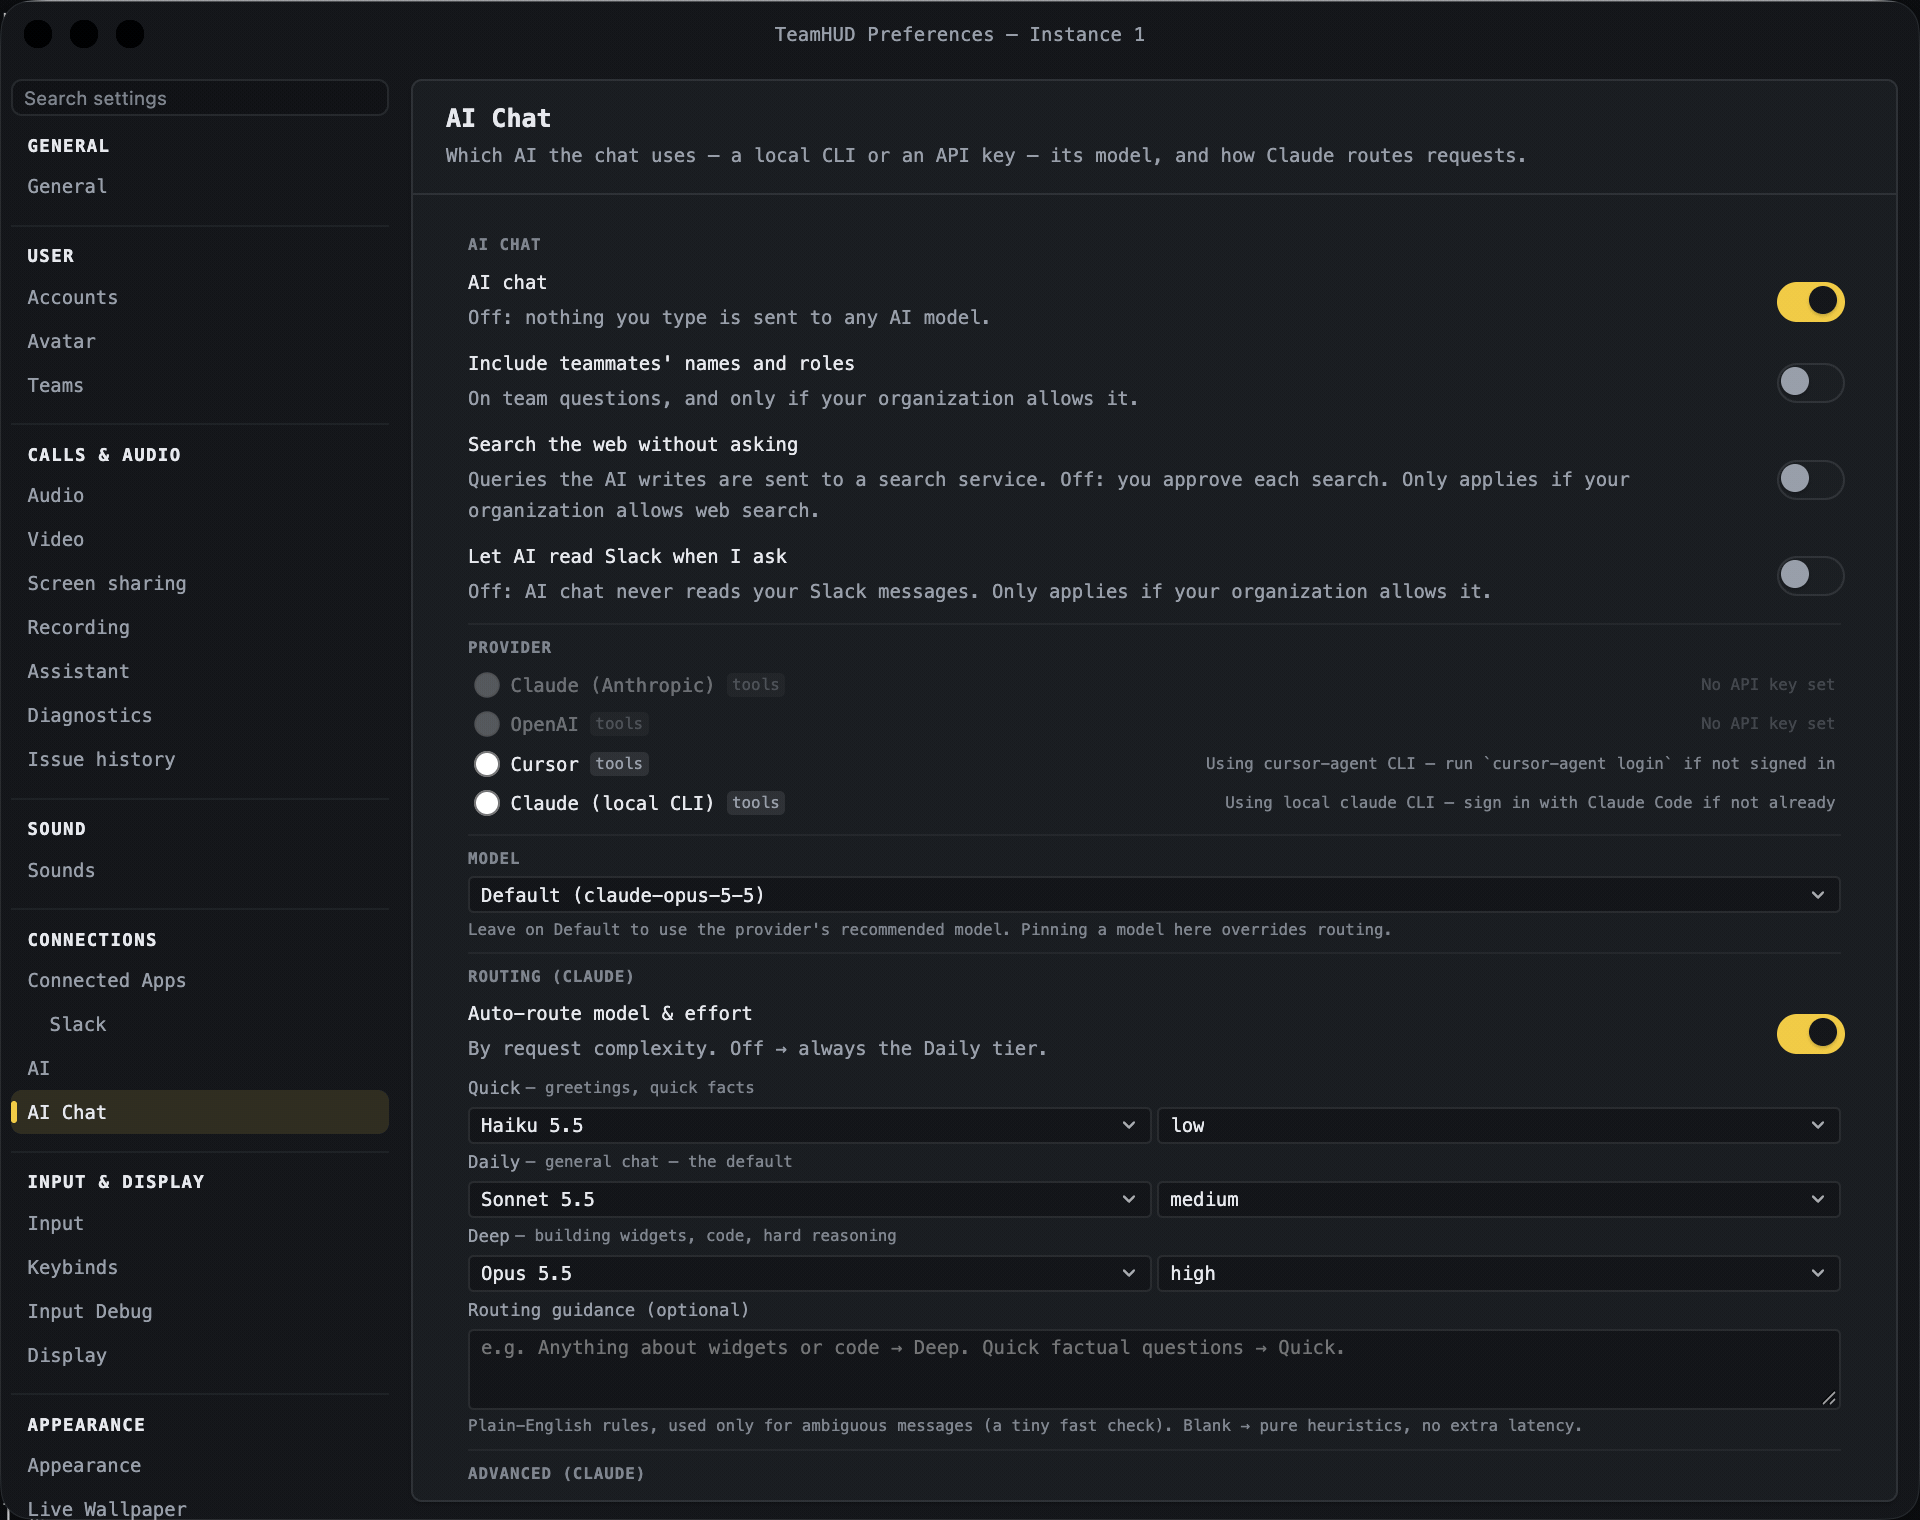
- Open settings. Use the settings button in the panel header, or open Preferences > AI Chat. Both show the same settings.
- Pick a provider. Under Provider, choose one that is not greyed out:
- Claude (local CLI) is available when the
claudecommand (Claude Code) is found on your computer. Sign in with Claude Code if you have not. - Cursor is available when the
cursor-agentcommand is found. Runcursor-agent loginif you have not signed in. - Claude (Anthropic) and OpenAI are available once you add a key.
- Claude (local CLI) is available when the
- Add a key if you chose one. Under API Keys, paste it into Anthropic, OpenAI or Cursor. The field then shows “✓ saved”. Paste a new key to replace it.
- Choose a model (optional). Leave Model on Default to use the provider’s recommended model.
What you’ll see: the chosen provider selected, and each greyed-out provider says why (for example “No API key set” or “claude CLI not found — install Claude Code”).
Ask your first question
Section titled “Ask your first question”- Open AI Chat. Hover the hub. Or say “new AI chat” with Voice assistant.
- Type your question in the message box and send it.
- Read the answer. Your chats are saved as threads you can reopen. Delete a thread with its delete button, after confirming.
What you’ll see: a “thinking” indicator, then the answer. The hub shows a badge while the AI is working, when it needs your approval, when a turn failed, and when a finished answer is waiting.
How it differs from team chat
Section titled “How it differs from team chat”| Team chat | AI chat | |
|---|---|---|
| You talk to | Your teammates | An AI model |
| Who sees it | The people in the conversation | You, and the provider you chose |
| Needs | A team, signed in | The switch on, plus a local tool or a key |
Build a custom widget from chat
Section titled “Build a custom widget from chat”Ask for the widget in plain words, for example “make a widget that shows a countdown to Friday”. The AI proposes it, and nothing happens until you approve.
- Ask. Describe the widget.
- Review the card. A card reads Create widget “name”? and says the widget is sandboxed and what it can reach on the network, if anything.
- Pick how much to edit. Choose Defaults, Basic (name and position), Medium (adds size) or Detailed (adds description and tags).
- Approve. Choose Create, or Cancel. Changes and removals use Update and Delete the same way.
Next: Custom widgets.
If it goes wrong
Section titled “If it goes wrong”- “Add an API key in settings to start chatting.” No provider is ready. Do steps 4 and 5 above.
- A provider is greyed out. Its tool is not installed or not on your PATH, or no key is saved. Install it, then reopen settings.
- The local tool answers with a sign-in error. Sign in to Claude Code or
cursor-agentin a terminal, then ask again. - The AI cannot use a TeamHUD tool. Providers marked tools can; check the chip next to the provider name.