
Connect an agent
An agent connected to the TeamHUD MCP server can read the app’s logs and state, inspect the overlay and drive it, which makes it a fast way to build and debug a plugin or widget. This page gets one connected. The full tool and port details are in the MCP server reference.
Before you start
Section titled “Before you start”- TeamHUD running on this computer. The server listens on
127.0.0.1only. - An MCP client: Claude Code, Claude Desktop, Cursor, or any client that speaks streamable HTTP.
-
Open the connection details. In TeamHUD go to Preferences, Developer, MCP. It shows the server URL, your Admin token and a ready-made .mcp.json snippet.
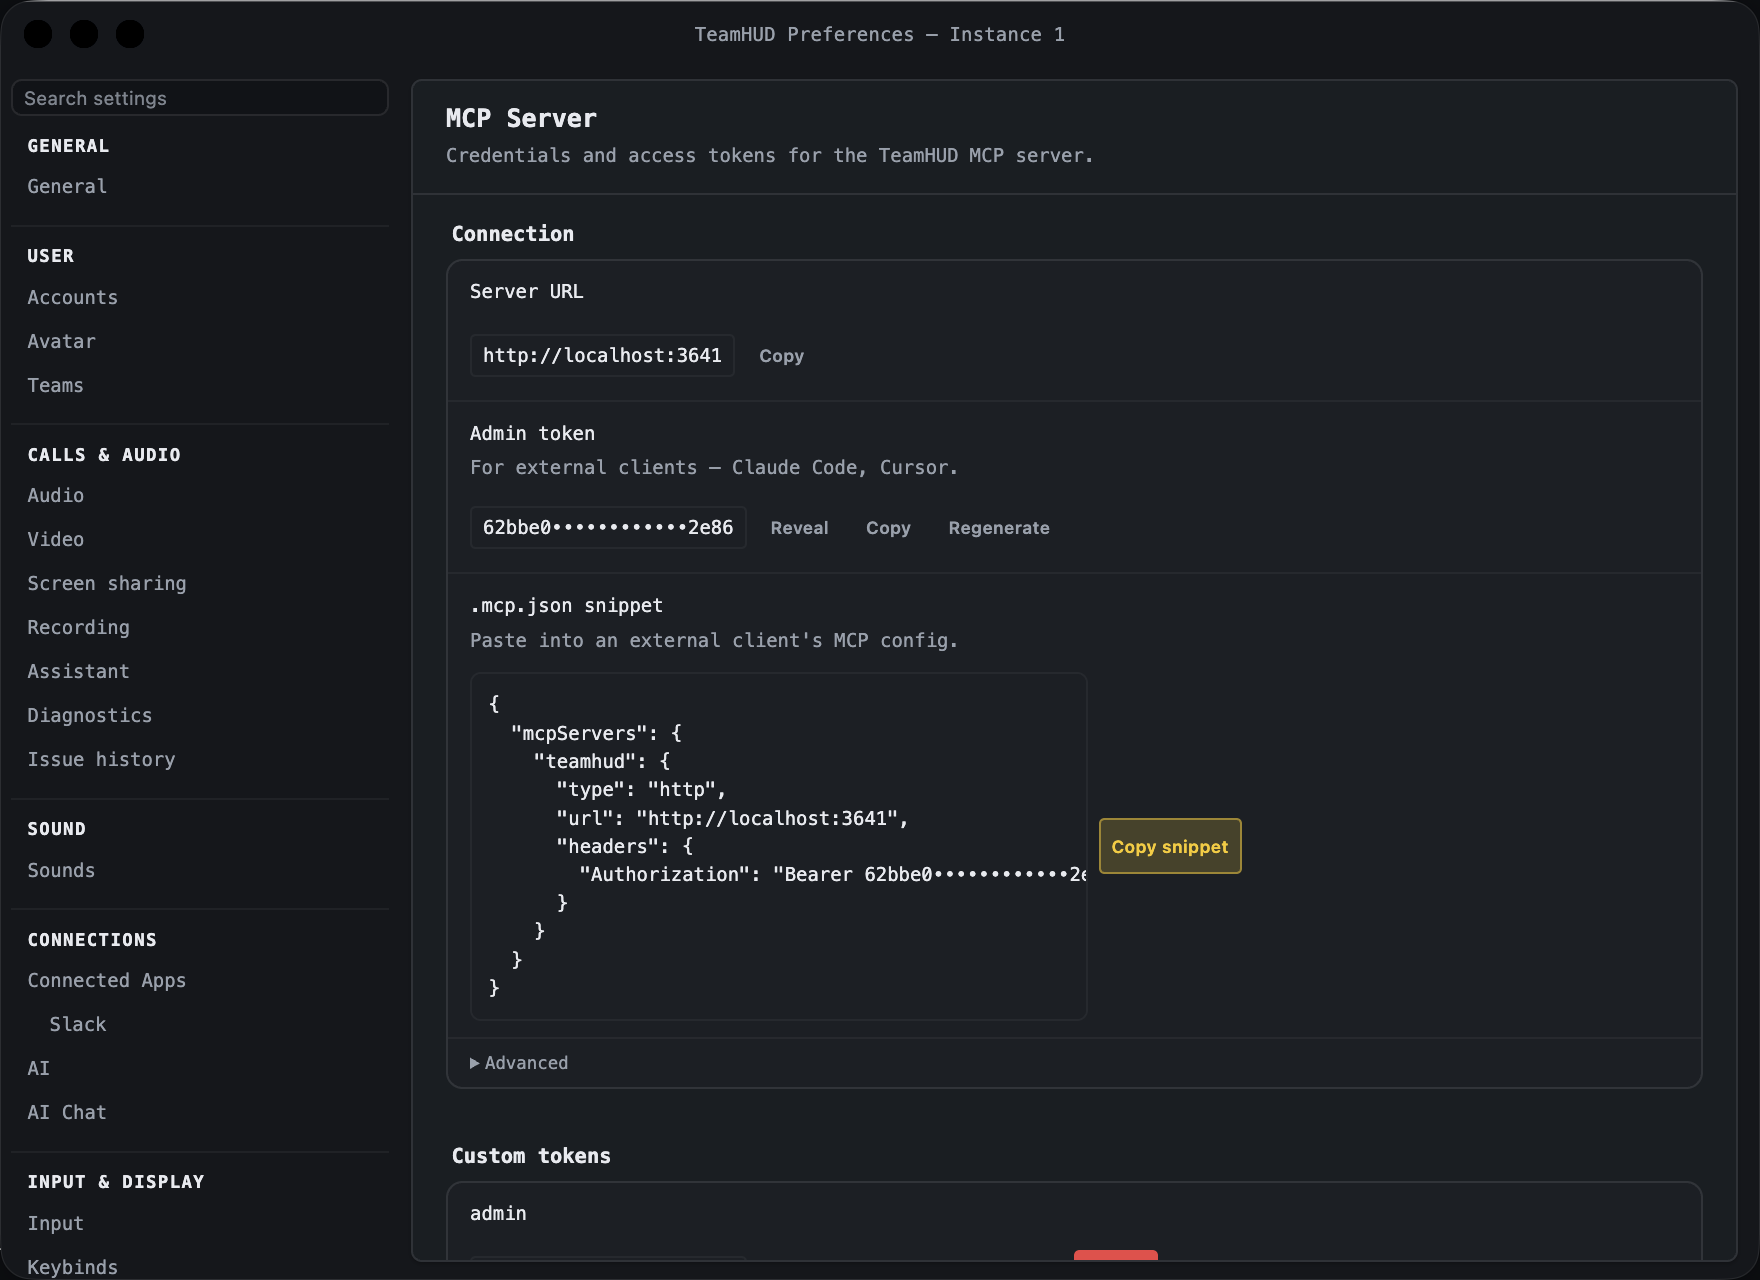
Preferences, Developer, MCP: the URL, token and snippet are filled in for you. -
Copy the snippet. Press Copy snippet. It already contains your live port and token. It looks like this:
{"mcpServers": {"teamhud": {"type": "http","url": "http://localhost:28443","headers": { "Authorization": "Bearer YOUR_TOKEN_HERE" }}}}The URL is the server root, with no
/mcpon the end, and it ishttp://, nothttps://. Since 2026-10-24 the loopback server is plain HTTP with no certificate. If an old config sayshttps://localhost:28443, change it tohttp://. -
Give it to your client.
Paste the snippet into a project
.mcp.json(or your user~/.claude.json). Or add the server from a terminal:Terminal window claude mcp add --transport http teamhud http://localhost:28443 \--header "Authorization: Bearer YOUR_TOKEN_HERE"Restart Claude Code, then run
/mcpto seeteamhudlisted as connected.Paste the snippet into
.cursor/mcp.jsonin your project, then reload the window.Use the same three values: type
http, the URL, and anAuthorization: Bearer ...header. A token is required. -
Try it. Ask the agent to call
echo, thenget_app_info. Then something useful, such as “fetch the last 30 error logs” or “show the overlay status”.
Use a smaller token for a smaller job
Section titled “Use a smaller token for a smaller job”The admin token can do everything. For an agent that only needs part of the app, make a custom token under Preferences, Developer, MCP: give it a name, tick only the scopes it needs (logs, overlay, widgets and so on) and optionally an expiry, then Create token. Use that token in the client instead.
Two instances
Section titled “Two instances”Each extra instance shifts the port up by one: instance 2 is http://localhost:28444. Add a second server entry, named teamhud-2, with its own token. A packaged install uses 29443 instead of 28443. The pane always shows your exact port.
What you’ll see
Section titled “What you’ll see”The client lists teamhud as connected and shows the app’s tools. get_app_info returns the app version and build.
If it goes wrong
Section titled “If it goes wrong”- TLS or handshake error. The URL says
https://. Change it tohttp://. - 401 or “unauthorized”. The token is missing, wrong or was regenerated. Copy it again from the pane.
- Connection refused. TeamHUD is not running, or your instance uses a different port. Read the port in the pane.
- A tool is refused. A scoped token lacks that tool’s scope. Use the admin token or add the scope.
Where next
Section titled “Where next”- Test and debug with the logs and state tools.
- Add an MCP tool of your own.
- MCP server reference.